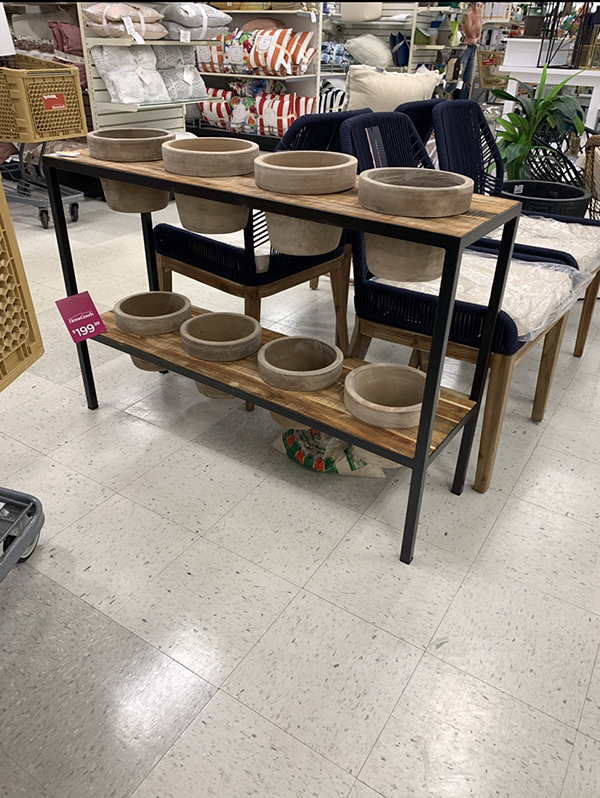
A few 12 months in the past, I noticed a planter desk at HomeGoods that caught my eye. However our deck was below building and it wasn’t 100% my fashion, so I snapped a pic to save lots of for future reference. Quick ahead to this 12 months and now we have a phenomenal new again deck and I lastly had the right spot for it, so we received to constructing my excellent DIY Rustic Two Tier Herb Planter!

Right here is the inspiration piece from HomeGoods. It is tremendous cute! I simply needed mine to have a little bit extra character. Prefer it had been sitting outdoors for years and had the right weathered end on it. Tremendous simple, proper? Learn on to seek out out :-p
I will preface this by saying there are in all probability numerous methods you would construct this desk however this was our course of – it did not go 100% easily however the imperfections add much more character 🙂
HOW TO BUILD A TWO TIER HERB PLANTER
SUPPLIES
- 6 1x6x6 pre-treated boards
- 4 2x4s
- steel braces
- off white creamy paint
- gel stain
Step 1
Reduce your boards to size. We made ours 5′ lengthy. And needed to run them by means of the planer however our planer solely matches a 12″ huge board. So he glued two boards collectively, clamped them and allow them to dry. As soon as dry he ran them by means of the planer after which glued the third board on, clamped and let dry.
Step 2
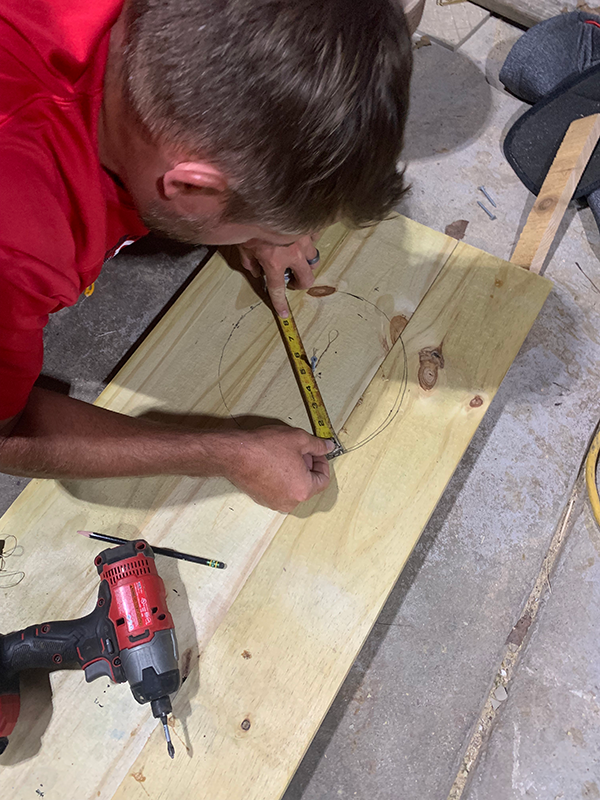
Now that you’ve your 3 boards glued collectively, you wish to draw out the holes on your pots. I used pots from Petitis Backyard Middle which is a neighborhood nursery. You should use any pot you need – simply ensure you get the fitting diameter from beneath the rim.
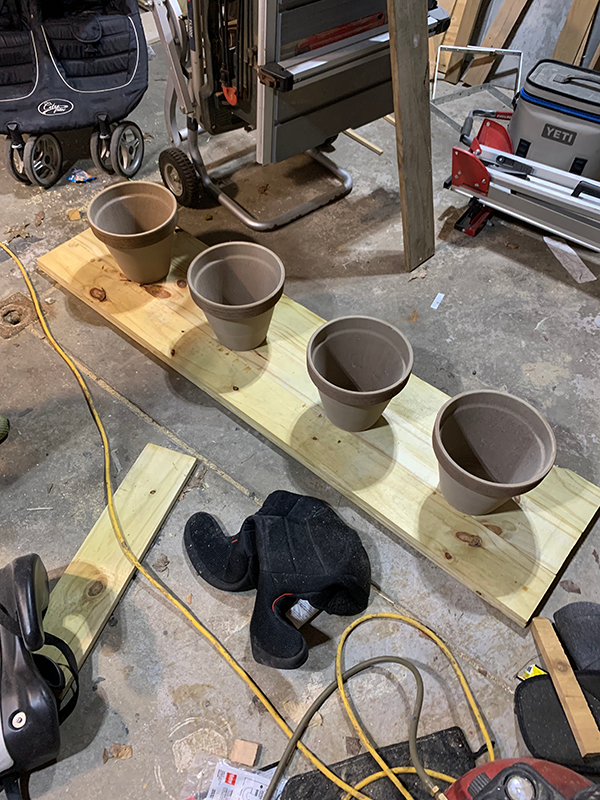
To attract your circles, measure out your spacing and discover the middle of your first pot. Nail a nail into that spot. Use a pencil to make a mark on all 4 sides on the size of the diameter. Then tie a bit of string across the nail and your pencil and transfer your pencil across the nail ensuring it hits all 4 of your marks. This could provide you with a fairly exact circle!
Repeat for all 8 pots.
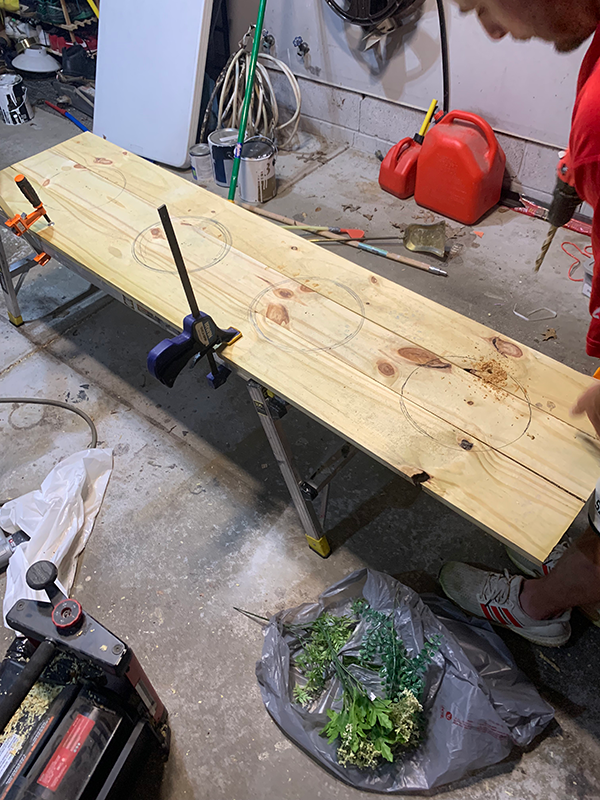
Step 3
Safe the boards. Connect the steel braces beneath to provide your boards extra stability and energy. Be sure to place them in between the circles!
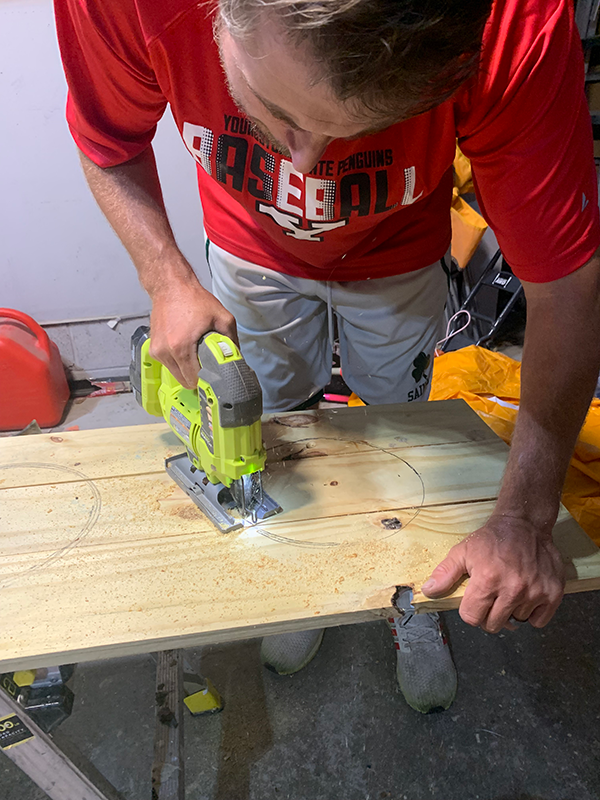
Step 4
Reduce out the holes utilizing a jigsaw. You should use a big drill bit to drill a gap anyplace contained in the circle to provide you a spot to start out with the noticed.
Step 5
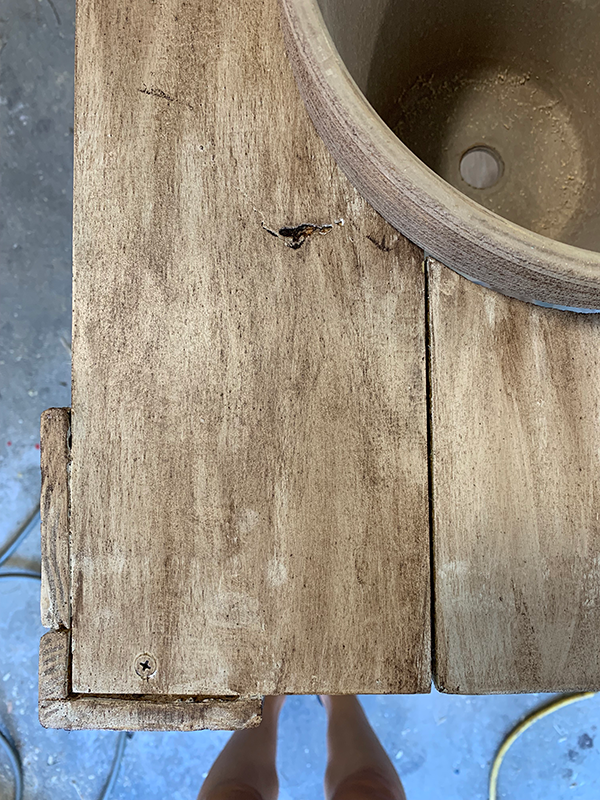
Constructing the legs is the place issues received a little bit tough for us. I wasn’t fairly certain how I needed the legs to connect to the desk, however Dan got here up with an concept that I actually preferred. He advised notching out small sections of the 2x4s to permit for the opposite boards to take a seat proper in them. I am an excellent visible individual so till he truly made one, I wasn’t fairly certain what it was going to seem like, however I trusted him!
For the tops of the legs, that is what you need:
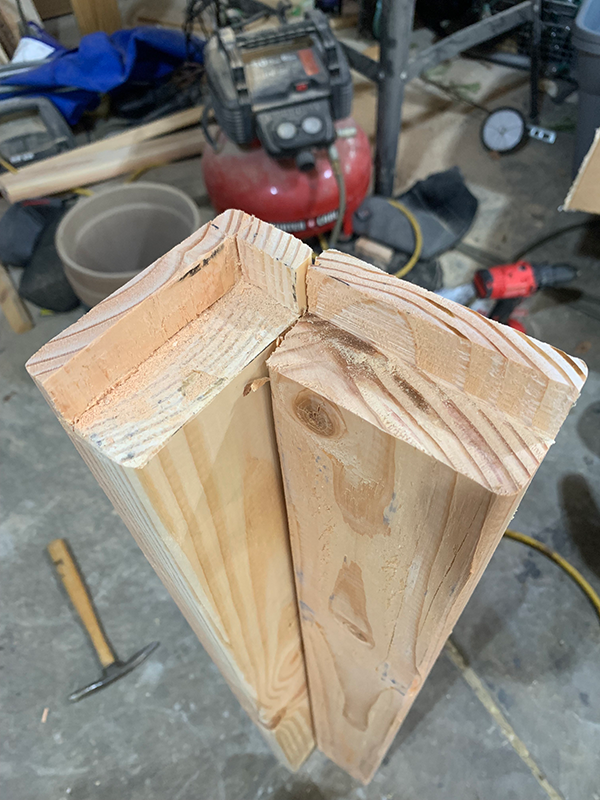
To create these cuts you may both use a router or the desk noticed. If utilizing the desk noticed, you’ll set your blade to the right peak so it does not minimize during the wooden. Then you definitely merely hold transferring the information over by about 1/4″ increments to slowly chip away at it.
The underside notches prompted a little bit extra hassle as a result of he could not use the desk noticed. So he used a mixture of the router and the trusty whizzbanger.
The cuts aren’t excellent, however like I stated, I needed this to be rustic and weathered so I did not see them as errors, however simply added character
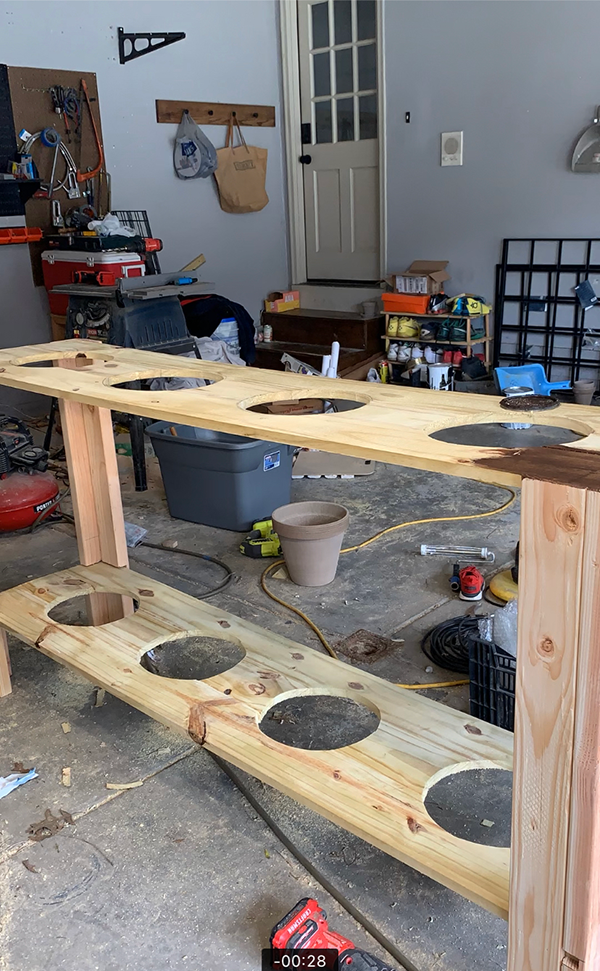
Step 6
Assemble your desk! The boards ought to match good and comfortable in your notches after which we used some screws for added assist as nicely.
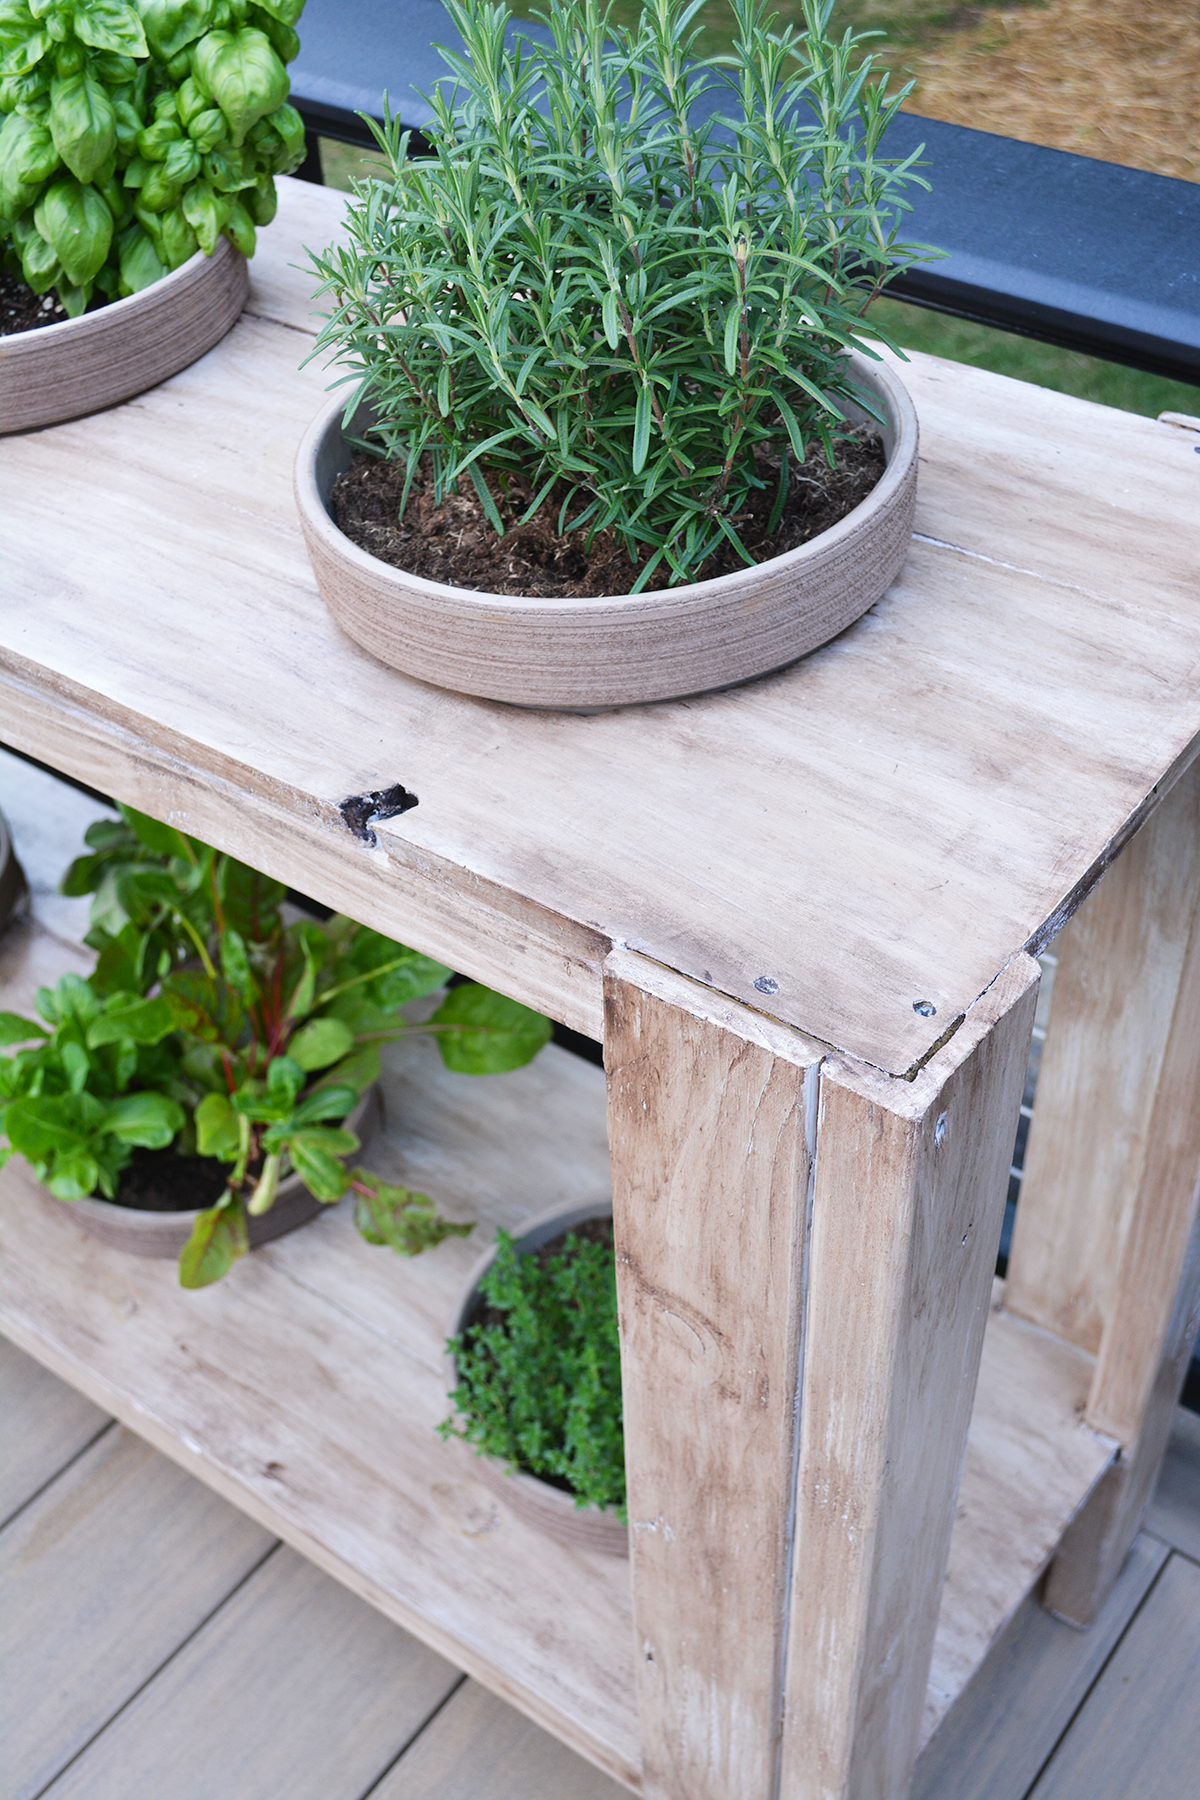
Now that the desk is constructed, it was my flip to step in and end it up. From the beginning I had the imaginative and prescient of staining it darkish in my favourite gel stain. However since we have been utilizing wooden that is not precisely furnishings grade, the stain did not take nicely and it simply did not look good.
So I did some brainstorming and remembered a way I had seen not too long ago the place you paint the furnishings with a light-weight coloured paint, after which apply a darkish wax over it and it offers the looks of fake oak wooden.
I attempted a small take a look at spot first and wasn’t offered. So as a substitute of utilizing the darkish wax, I used my gel stain on prime of the paint. I nonetheless was component however I used to be operating out of different concepts so I made a decision to simply go for it.
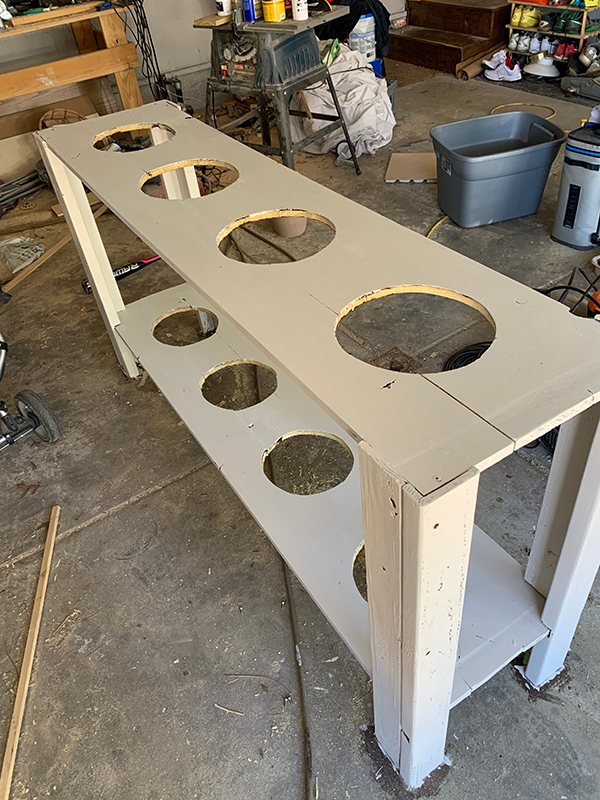
Step 8
It isn’t essential to stain your desk first for this methodology. I simply did as a result of that was my authentic plan! You can begin by simply portray your wooden a light-weight beige/mushroom shade. Once I received samples of island paint colours for our kitchen, there was one jar they did not put a label on and naturally that is the jar I used. So I do not know what shade it’s!
Step 9
After the paint dries take an outdated rag and dip it in your gel stain. I used my trustworthy Varathane Darkish Walnut Gel Stain. Dab off the surplus onto a paper towel or scrap piece of wooden and begin wiping it in your desk within the route of the grain. Do not freak out if it appears actually darkish and ugly. As a result of it’ll at first ha. Simply hold wiping and wiping. You need it to be a really skinny layer.
I repeated this twice to get the specified shade I needed. You would do much less or extra relying on what you want! The bottom line is simply to ensure you apply backwards and forwards with the grain as a result of the strains created with the gel stain are going to be the brand new fake grain.
Step 10
Seal it up! I used Varathane’s Spar Urethane for exterior.
Step 11
Plant all of your herbs! Since these pots are sitting above the bottom and may’t have a drain plate beneath them, I did a little bit trick I realized. Place a couple of espresso filters within the backside of every pot earlier than including soil. It permits the vegetation to nonetheless drain, however it helps hold the moisture in and helps hold all of the soiled soil water from operating throughout your deck. Thus far it appears to be working nicely!
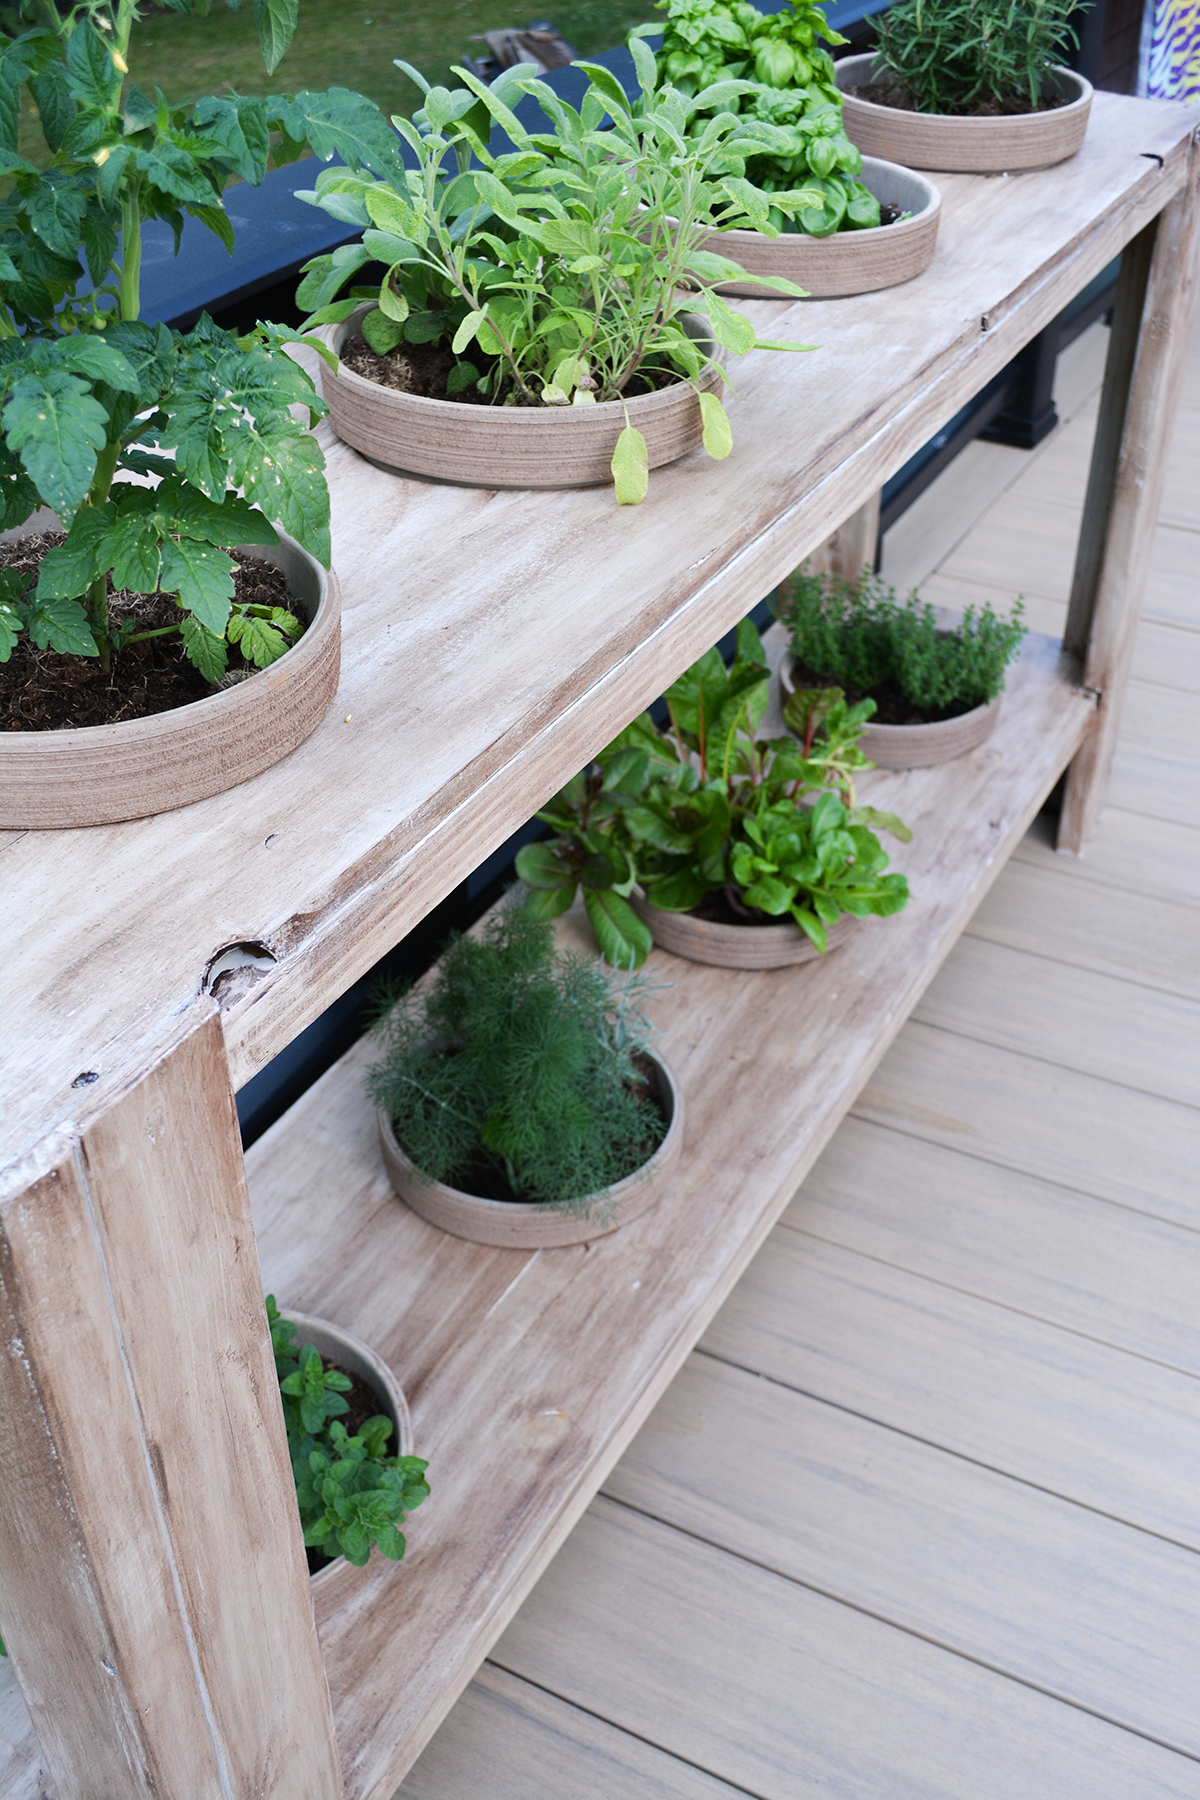
I received basil, thyme, oregano, dill, curry, lettuce, child tomatoes, rosemary and sage.
Step 12
Water and luxuriate in! The underside row will get about 5 hours of solar a day which ought to be ample, however I can at all times rotate among the pots if I have to!
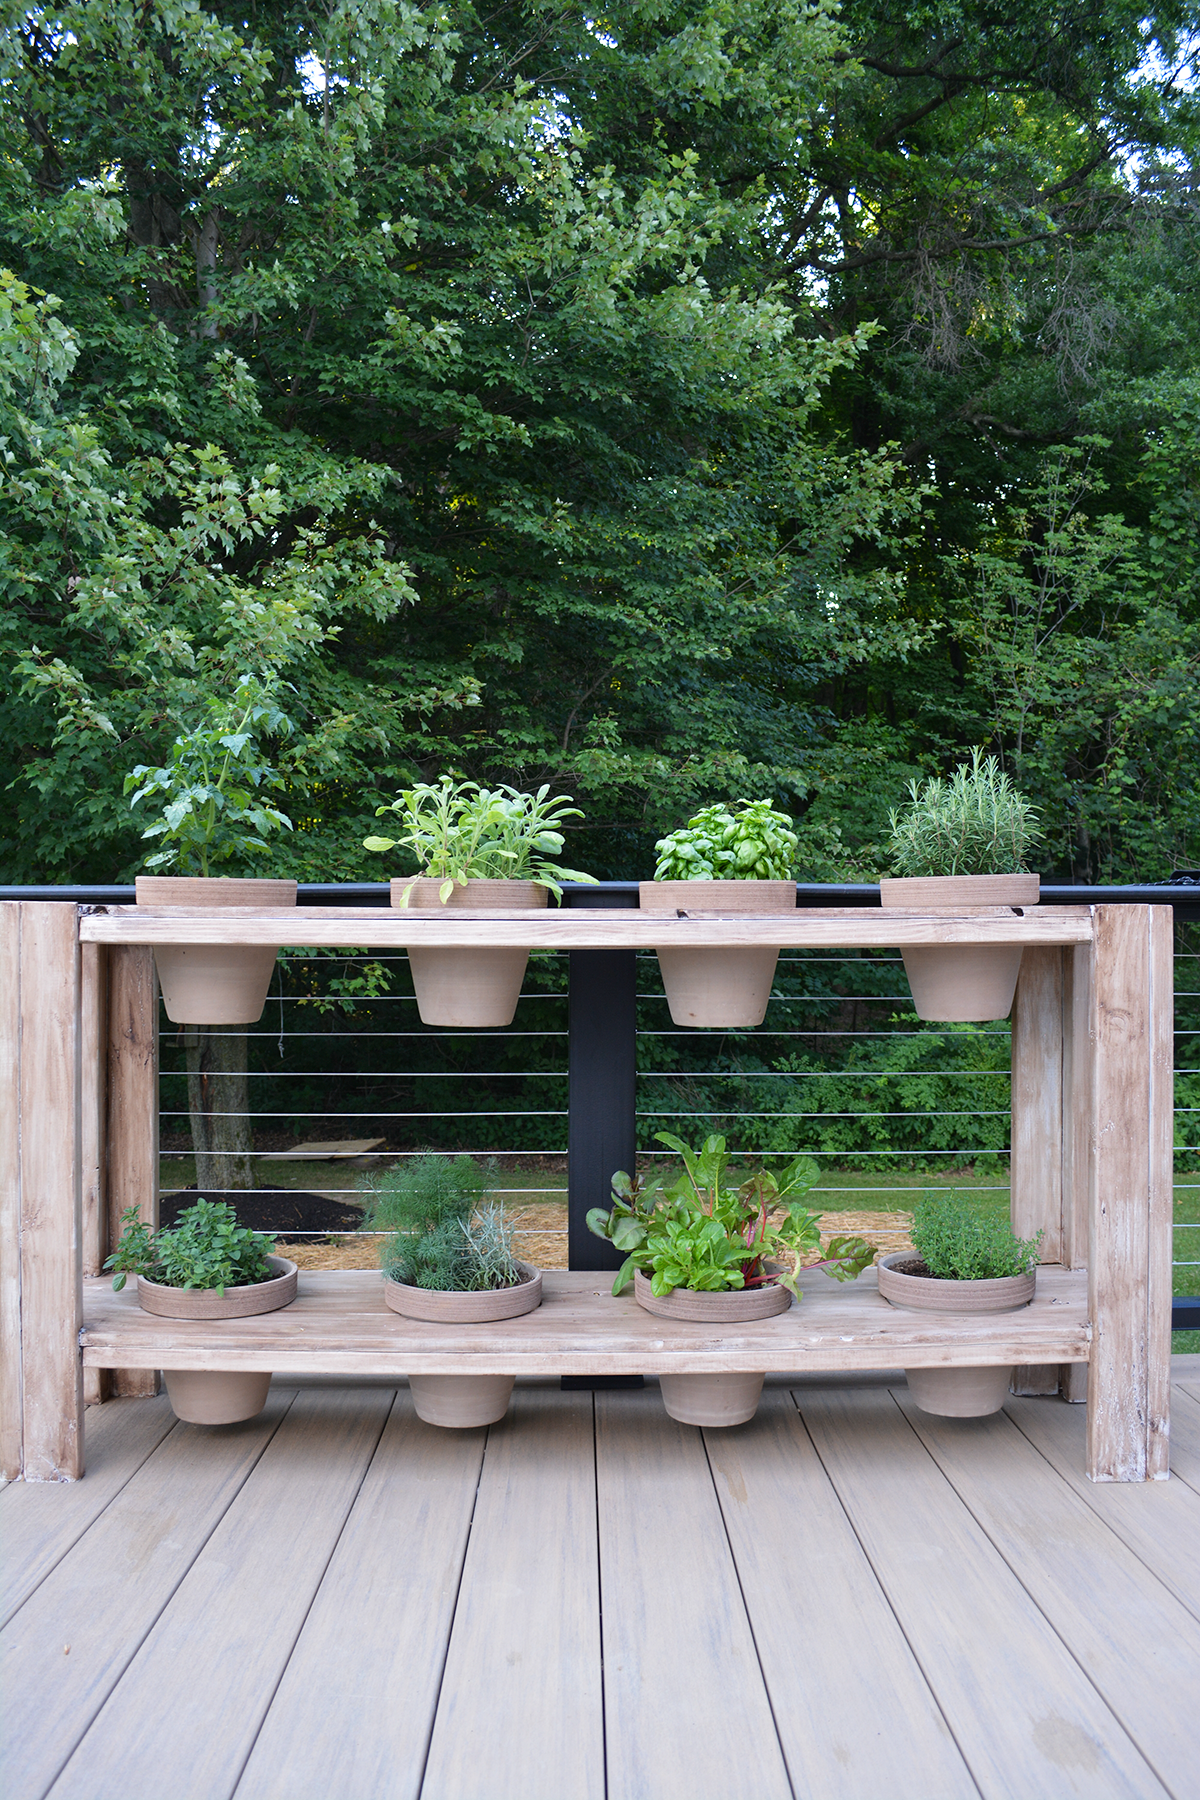
I LOVE how this turned out. It appears so lovely on our deck and virtually matches our decking, which was by no means my intent. I assumed for certain this may be a darkish stained piece, however what began as a staining catastrophe, become one thing extra lovely than I ever imagined!
We did additionally find yourself attaching extra 2x4s below the center part on the back and front for added assist. As soon as the pots have been in, the center was sinking a bit so this helped hold it straight!
And now I can not wait to make all of the scrumptious summer time recipes utilizing my contemporary herbs! What do you assume? Would you construct this DIY Two Tier Herb Planter?